
What is RabbiMQ?
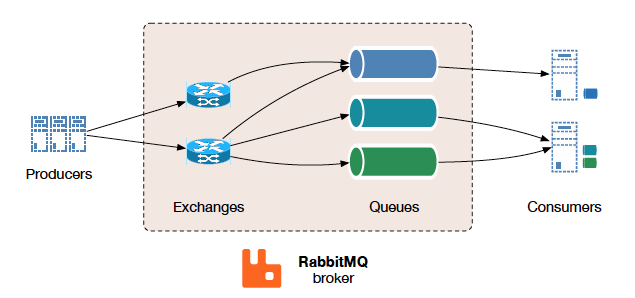
RabbitMQ is a an open source message broker that acts as a middleman for various services.In fact it was one of the first brokers to achieve a reasonable level of features, client libraries, development tools, and quality documentation. It was originally developed to implement AMQP, an open wire protocol for messaging with powerful routing features. Communication can be either synchronous or asynchronous depending on your needs. Publishers send messages to exchanges, and consumers retrieve messages from queues.
Use Cases
What is the acual use of RabbitMQ you wonder? Here is a real life example..
Image you have a web application written in Node.js. On the ther hand you have another application running on Windows/Linux written in C. Now the Node.js application needs data from the C application, it would be a real pain to have to use native interfaces to achive this and that is where RabbitMQ shines. You take the data you need from the C application and push it to a queue, then a consumer steps in and forwards the data to the Node.js application. This is just one tiny simple example to give you a general idea.
Running Multible instances on 1 machine
You may be wondering why? Why would you want more then one instance?
Since i’m currently working with it, i’ll tell you why i needed more then one. I’m working on an java platform utilizing microservices, basically we have 5 diffrent java projects working together. We use 1 RabbitMQ to receive data from our client, we use the 2nd for logs and auditing. Instead of having 5 diffrent log files for each of the components we send all the logs to a queue after that we use Logstash to take the logs from RabbitMQ and store them in Elasticsearch, where we use Kibana for visualization.
Can all of this be achived with one server? Of course it can, but what happens if one of the servers shuts down for whatever reason. Say the RabbitMQ we use to receive the data goes down, if the logs are on the same server just a diffrent queue they wouldn’t work either. Or in another case, the server used for the logs and audit shuts down. Then we won’t receive the data from the client. The 2 servers are completely independent from one another, which give you more room to act if something were to happen.
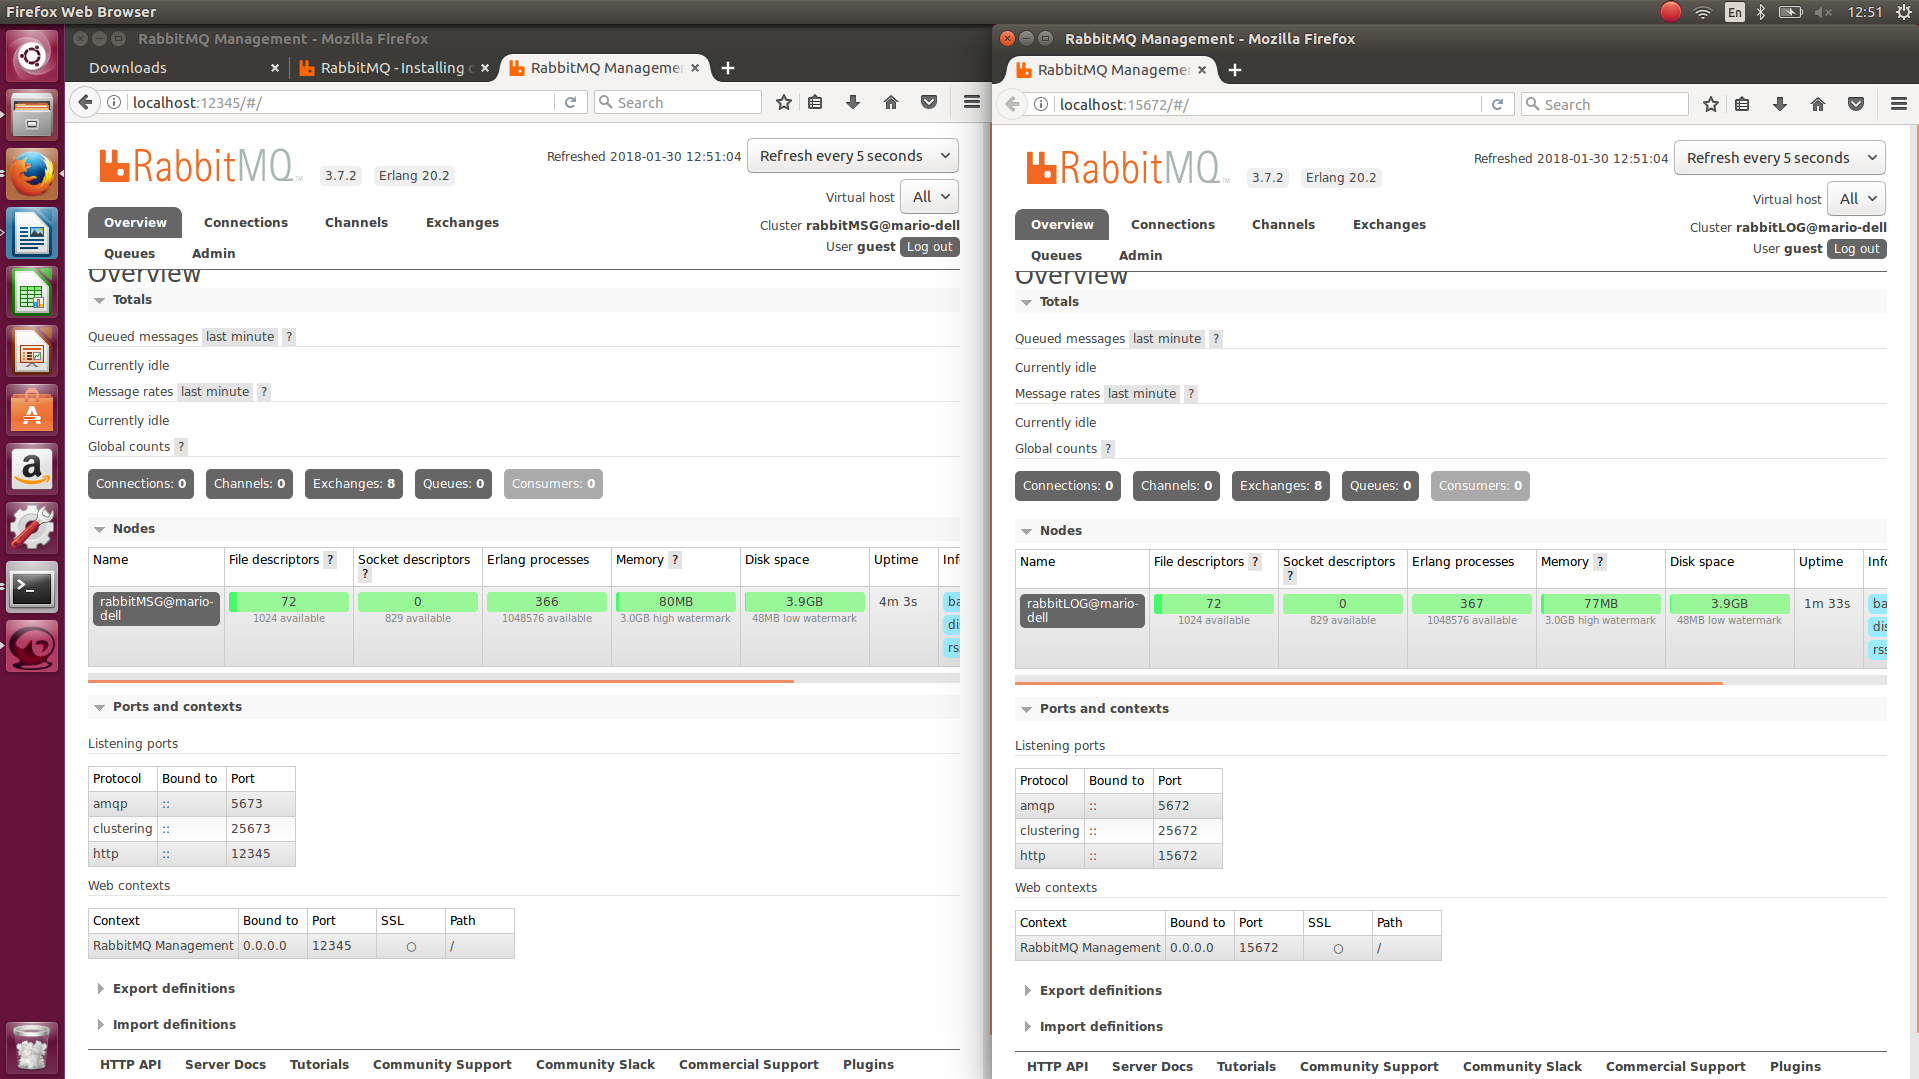
To set up diffrent servers all you have to do is change the listening port and the node name. The end result would look something like this..
For Linux:
1. Make sure you have Erlang installed, then download the latest version for Generic Unix and extract it.
2. Go to rabbit installation folder (the folder you just extracted)
sbin -> open the rabbitmq-defaults file and change SYS_PREFIX=${RABBITMQ_HOME} to create the default folder somewhere else, you should set the path to the extracted folder, for ex. /home/YOUR-USERNAME/rabbit_server-msg(this is my extracted folder).
3. Change the node name. Open the rabbitmq-env file
Find NODENAME=rabbit@${HOSTNAME} and change the name rabbit (ex. rabbitMSG@${HOSTNAME}). In the same file locate and change DEFAULT_NODE_PORT, by default it’s set to 5672. The default clustering port is set by ${DEFAULT_NODE_PORT} + 20000. So if you set the default node port to 5673, the clustering port will be 25673.
4. Install the Management Plugin.
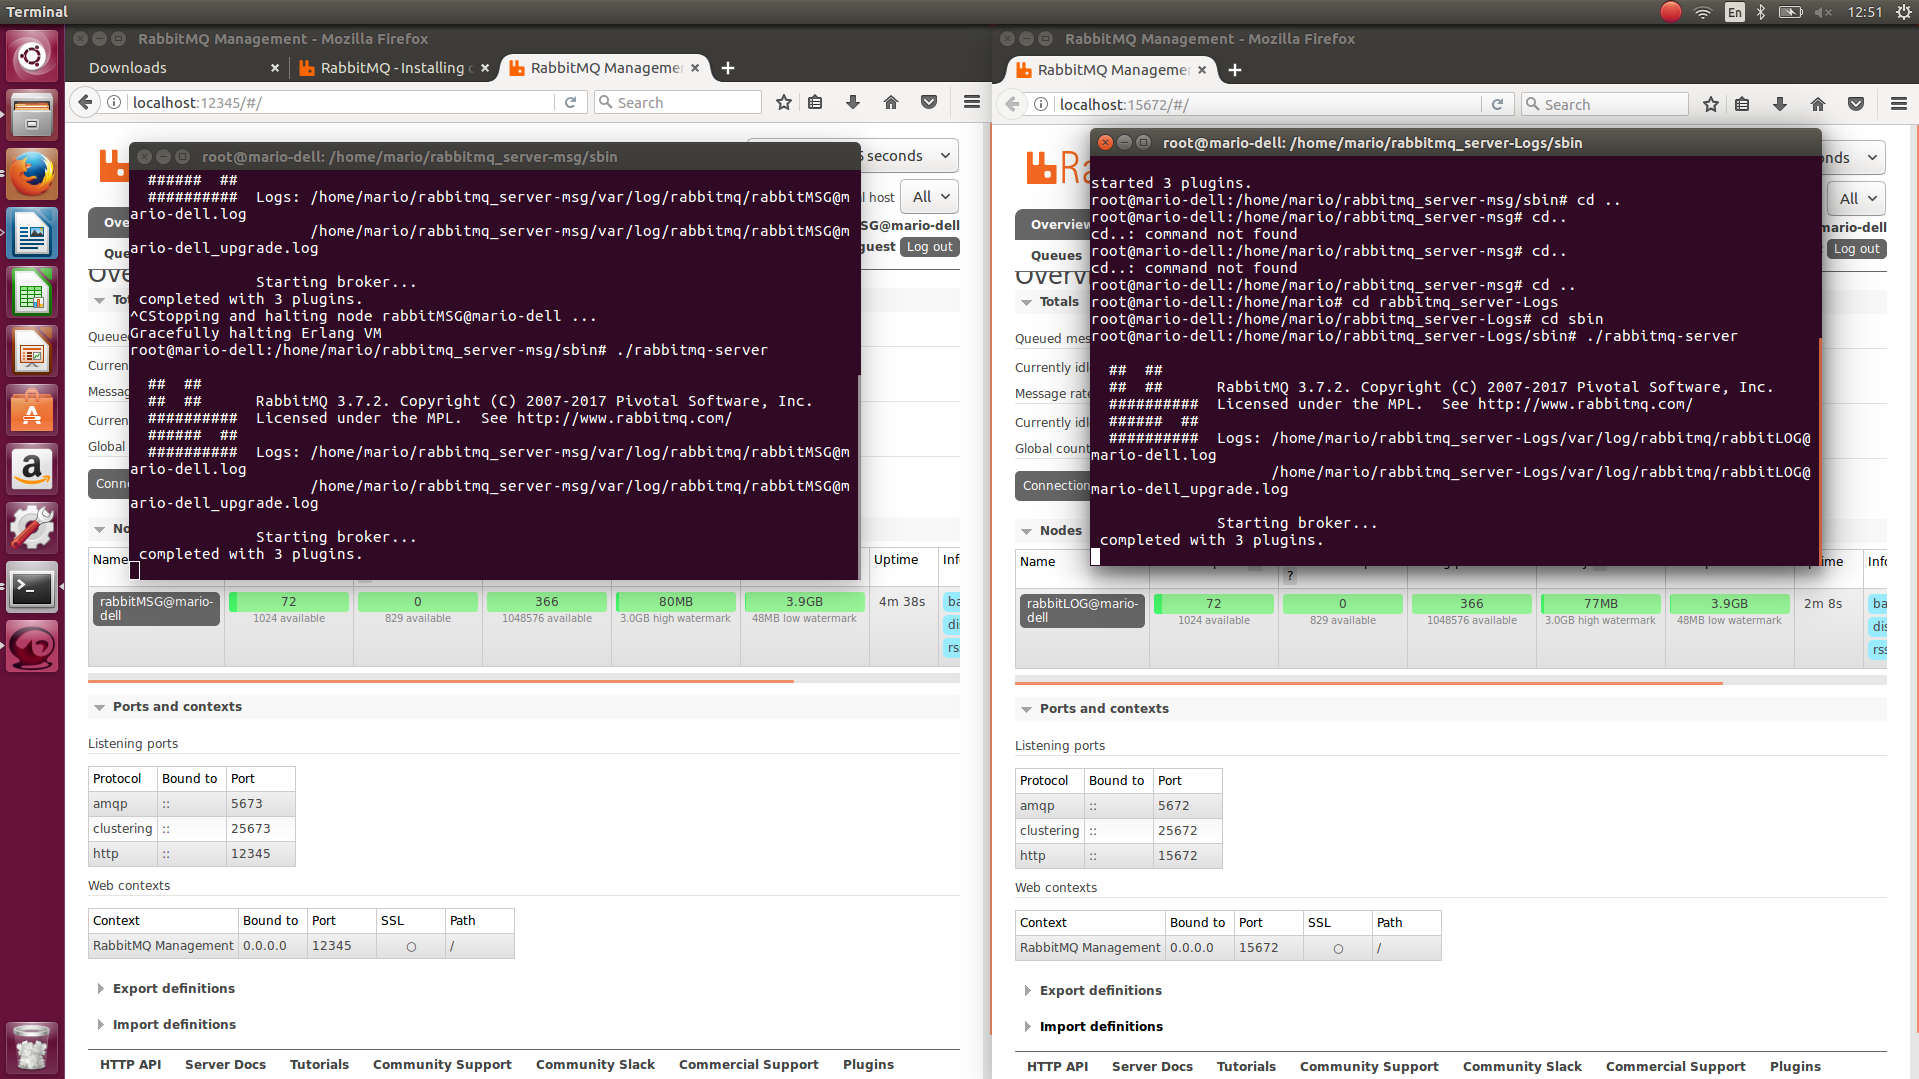
Navigate to rabbitmq-server/sbin and run “./rabbitmq-plugins enable rabbitmq_management”
5. The AMQP and HTTP ports need to be chnaged in the config file. Copy the file rabbitmq.config.example and paste it in the rabbit_server-msg(again this is my extracted forlder)/etc(this is the default folder created by RabbitMQ from step 1)/rabbitmq folder, rename the file to just rabbitmq.config. If you can’t find the file rabbitmq.config.example in the rabbit folder create a file named rabbitmq.config and copy the code from their GitHub.
6. Open the config file and uncomment the following lines:
– {tcp_listeners, [5672]} and change the port number (It is recommended to set the same number as the DEFAULT_NODE_PORT in rabbitmq-env for example 5673).
– {listener, [{port, 12345} and change the port number (This is for the management plugin).
NOTE: Be careful with the commas and brackets. Remove the comma after {tcp_listeners, [5672]}. Also after {listener, [{port, 12345} close the brackets like so ]}. Otherwise when you try to run ./rabbitmq-server it will show errors (It will show you on which line in the config file you have an error so you can fix it).
Starting RabbitMQ
Now start up the server and log in the manager. Check the Listening ports under Ports and contexts to see if you made the changes. Do this for the other servers and you will be able to run as many servers as you want on 1 machine all with different listening ports. To start the RabbitMQ server automatically when you log in use the Startup Application program.
If you have any troubles with the setup i made a complete how-to video, you can check it out HERE.
For Windows:
Setting up RabbitMQ for Windows is preatty much the same as on Linux.
1. Make sure you have Erlang installed, then download the latest version for Windows and extract it.
2. Go to rabbit(the folder you just extracted)
sbin -> open the rabbitmq-defaults.bat file and change RABBITMQ_BASE to create the default folder somewhere else, you should set the path to the extracted folder, for ex. C:/rabbit_server-msg(this is my extracted folder).
3. Change the node name. Open the rabbitmq-env.bat file
Find RABBITMQ_NODENAME=rabbit@!HOSTNAME! and change the name rabbit (ex. rabbitMSG@!HOSTNAME!). In the same file locate and change RABBITMQ_NODE_PORT, by default it’s set to 5672. To change the default clustering port locate and change RABBITMQ_DIST_PORT, by default it’s set to 25672.
4. Install the Management Plugin.
Navigate to rabbit-server/sbin and run “rabbitmq-plugins.bat enable rabbitmq_management”.
5. The AMQP and HTTP ports need to be chnaged in the config file. Create a file named rabbitmq.config and copy the code from their GitHub. Put the file in your installation folder/RabbitMQ (ex. my config is in C:/rabbit_server-msg/RabbitMQ). Also in the rabbitmq-defaults.bat file check CONFIG_FILE it should be set to CONFIG_FILE=!RABBITMQ_BASE!\rabbitmq.
6. Open the config file and uncomment the following lines:
– {tcp_listeners, [5672]} and change the port number (It is recommended to set the same number as the RABBITMQ_NODE_PORTin rabbitmq-env for example 5673).
– {listener, [{port, 12345} and change the port number (This is for the management plugin).
NOTE: Be careful with the commas and brackets. Remove the comma after {tcp_listeners, [5672]}. Also after {listener, [{port, 12345} close the brackets like so ]}. Otherwise when you try to run rabbitmq-server.bat it will show errors (It will show you on which line in the config file you have an error so you can fix it).
Starting RabbitMQ
Now start up the server and log in the manager. Check the Listening ports under Ports and contexts to see if you made the changes. Do this for the other servers and you will be able to run as many servers as you want on 1 machine all with different listening ports.